Are you ready to elevate your hairstyle game and rock a look that exudes style and confidence? Fade haircuts are the ultimate way to achieve a sleek and modern aesthetic that never goes out of fashion. Whether you’re aiming for a low fade, high fade, or skin fade, mastering the art of fading is key to achieving that sharp and polished appearance. Join us as we delve into the world of fade haircuts with this step-by-step guide that will have you looking fresh and on point in no time!
Understanding the Different Types of Fades
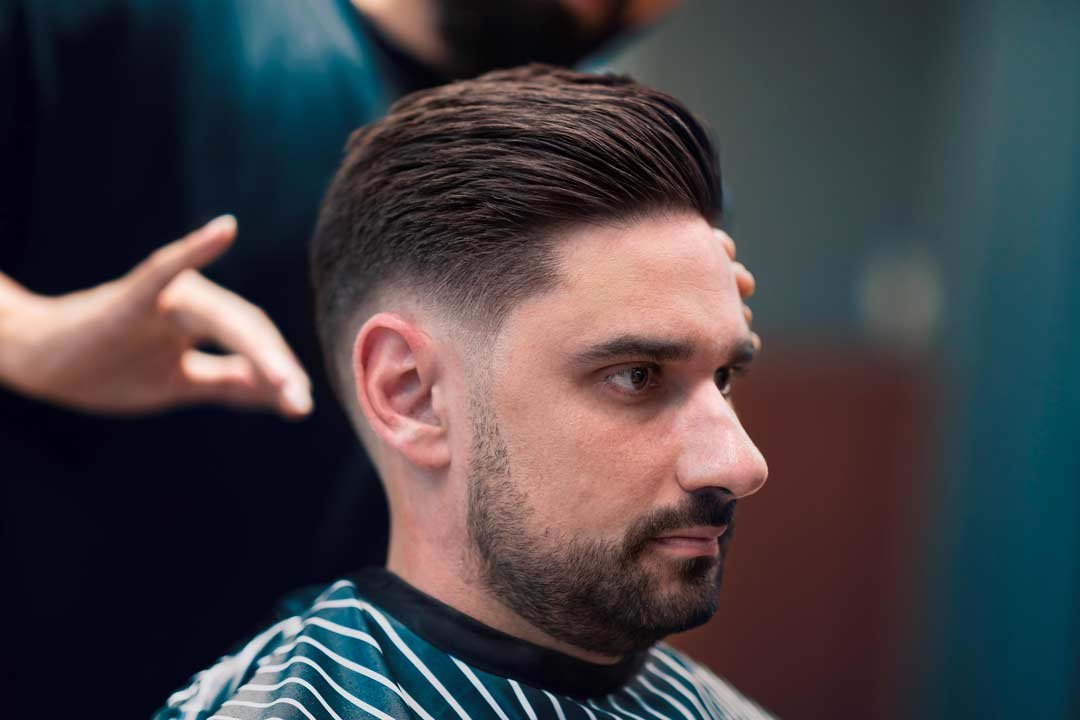
When it comes to fade haircuts, understanding the different types of fades is crucial for achieving the look you desire. The classic fade features short sides that gradually blend into longer hair on top, creating a clean and sharp appearance. A low fade starts with short hair around the ears and neckline, gradually increasing in length as it moves up towards the temples.
On the other hand, a high fade typically begins much higher on the head, resulting in a more dramatic contrast between the shaved sides and longer hair above. For those looking for something in between, a mid fade offers a balanced look with medium-length sides blending seamlessly into the top section. Each type of fade brings its unique style and flair to your haircut, so choose wisely based on your personal preference and desired aesthetic!
Essential Tools for a Perfect Fade
When it comes to achieving a flawless fade haircut, having the right tools at your disposal is crucial. One of the essential tools you’ll need is a high-quality clipper with various guard sizes. These guards will help you control the length of hair you’re cutting and ensure a smooth transition between different sections.
In addition to clippers, investing in quality scissors and combs is also important for precision cutting and blending. A wide-tooth comb can help detangle hair before trimming, while barber shears are perfect for detailing and refining the fade.
To maintain cleanliness and hygiene during the haircut process, don’t forget to have disinfectant spray or wipes on hand to sanitize your tools between clients or uses. This simple step can prevent infections or skin irritations caused by bacteria buildup on equipment.
A handheld mirror is indispensable for checking angles and ensuring symmetry while fading hair. By using these essential tools effectively, you can achieve professional-looking fade haircuts with ease.
Step-by-Step Guide to Achieving a Fade Haircut
When it comes to achieving a flawless fade haircut, following the right steps is crucial. Start by preparing the hair – wash and dry it thoroughly to ensure an even cut. Next, choose the appropriate clipper guard size based on the desired length for your fade.
Trim the sides and back first using short upward motions, gradually increasing in length as you move up. This creates that seamless blend from shorter to longer hair. Remember to take your time and be patient with each section.
Blending in the top section is where artistry comes into play. Use scissors or a comb to carefully blend in the longer hair on top with the faded sides and back. Precision is key here for a smooth transition between lengths.
Finish off by refining any uneven spots and perfecting the overall look of your faded haircut. It’s all about attention to detail and taking those extra moments to ensure perfection.
Preparing the Hair
Before diving into the actual fade haircut process, it’s crucial to start with properly preparing the hair. Begin by washing and conditioning your hair to ensure a clean canvas for the haircut. This will make it easier to work with and achieve a more precise cut.
Next, towel-dry your hair until it is damp but not dripping wet. This will help the clippers glide smoothly through the hair during the cutting process. Comb through your hair to remove any tangles or knots that may hinder an even trim.
If you have longer hair on top that you want to preserve, consider sectioning it off and clipping it out of the way before starting on the sides and back. This will help maintain length where needed while focusing on creating a seamless transition between different lengths in your fade.
By taking these initial steps to prepare your hair properly, you set yourself up for success in achieving a flawless fade haircut that looks sharp and well-groomed.
Choosing the Right Clipper Guard Size
When it comes to achieving the perfect fade haircut, choosing the right clipper guard size is key. The guard size determines how much hair will be left on your head after each pass of the clippers.
Different guard sizes produce varying lengths, so it’s essential to have a clear idea of how short or long you want your fade to be. A smaller guard size like #1 will leave less hair compared to a larger guard like #4.
Consider starting with a longer guard size and gradually working your way down if you’re unsure about the length. It’s better to take off more hair gradually than realize you’ve gone too short too quickly.
Experimenting with different guard sizes can help you find what works best for your desired fade style, whether it’s a subtle low fade or an edgy high-skin fade. So, don’t be afraid to test out various options until you achieve your ideal look.
Trimming the Sides and Back
Once you’ve selected the right clipper guard size and prepared the hair for a fade haircut, it’s time to focus on trimming the sides and back. This step is crucial in achieving that seamless transition from short to long hair lengths. Start by using your clippers without a guard to create a clean guideline around the bottom of the sides and back.
Next, gradually work your way up with longer guard sizes, blending the shorter hair into the top section seamlessly. Remember to use gentle, smooth motions while trimming to avoid any harsh lines or uneven patches.
Pay close attention to detail as you move around the head, ensuring symmetry on both sides. Don’t rush this part of the process; patience is key when aiming for a polished fade haircut.
Continue refining your technique until you achieve a well-blended look that transitions smoothly from short to long lengths. Taking your time during this stage will ultimately result in a professional-looking fade that complements your overall style perfectly.
Blending in the Top Section
Once you’ve tackled the sides and back of your fade haircut, it’s time to focus on blending in the top section seamlessly. This step is crucial in achieving a polished and cohesive look.
Start by combing the hair on top to remove any tangles or knots. This will make it easier to work with and ensure a more even blend. Use your clippers or scissors, depending on your preferred technique, to carefully trim and blend the top section into the shorter sides.
Remember that precision is key here; take your time and make small adjustments as needed. Don’t rush through this part of the process, as it can greatly impact the overall result of your faded haircut.
Pay close attention to detail while blending in the top section – aim for a gradual transition from longer hair on top to shorter hair towards the sides and back. A well-executed blend will create a smooth and professional finish that enhances your overall hairstyle.
Finishing Touches
After blending the top section seamlessly into the fade, it’s time for those final finishing touches that will take your haircut to the next level. Grab a mirror and make sure every angle is perfect before moving on.
Using a smaller clipper guard, carefully clean up any stray hairs along the hairline and neckline. Pay attention to detail as these small adjustments can make a big difference in the overall look of your fade.
Don’t forget about edging! Define the edges with precision by using trimmers or a razor for sharp lines. This step adds polish and gives your face a professional touch.
Take a moment to check for symmetry and balance. Make any necessary tweaks to ensure both sides are even and flawless. A well-executed finish will elevate your fade from good to great!
Maintenance Tips for a Longer-Lasting Fade
Maintenance Tips for a Longer-Lasting Fade
To ensure your faded haircut stays looking sharp and fresh, regular maintenance is key. Here are some tips to help you maintain that perfect fade:
1. Schedule Regular Touch-Ups: Aim to visit your barber every 2-4 weeks for a quick trim to keep the fade looking clean and well-defined.
2. Invest in Quality Hair Products: Use hair products like pomade or styling gel to keep the hair in place and maintain the desired shape of your fade.
3. Wash Your Hair Properly: Be sure to use shampoo and conditioner suitable for your hair type, and avoid overwashing which can strip the hair of its natural oils.
4. Protect Your Hair from Heat Damage: Limit the use of heat-styling tools like flat irons or blow dryers, as excessive heat can cause damage and affect the appearance of your fade.
5. Embrace Natural Texture: Work with your natural hair texture when styling your fade, as this will make it easier to manage between salon visits.
By following these maintenance tips, you can enjoy a longer-lasting and effortlessly stylish fade haircut that turns heads wherever you go. Keep up with regular trims, proper grooming routines, and quality products to rock that flawless fade look with confidence!
Leave a Reply